By: Liz Valpatic—
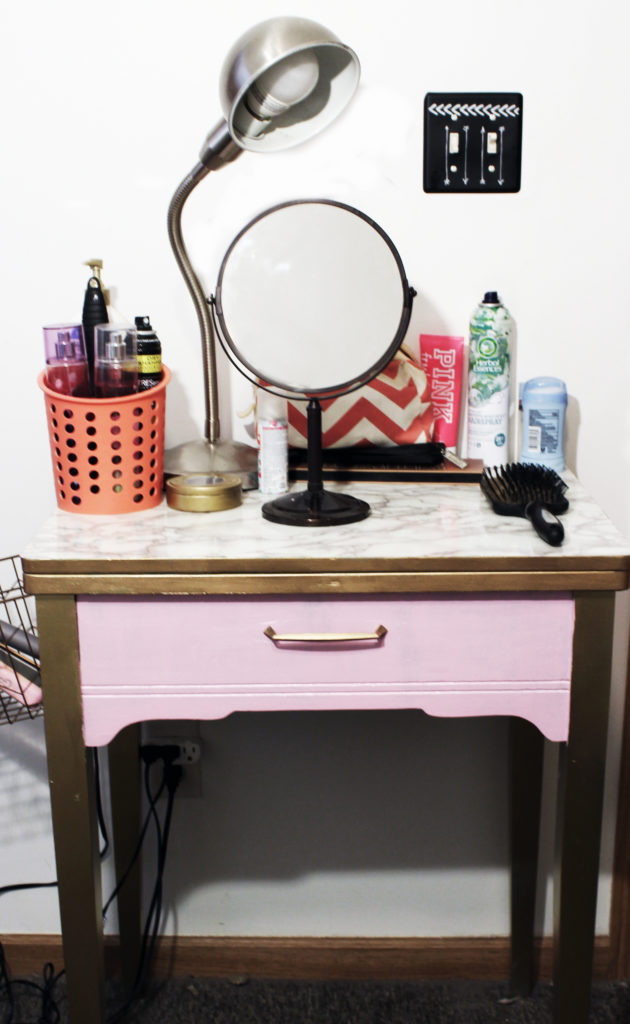
If you’re like me, you like to craft pretty things that are also useful. There’s nothing worse than your hard work going unutilized! Luckily, I use this project every day and I finally love how it looks in my room after I completely revamped it.
And the best part is…drum roll please….it only took me ONE day to do!
Without further adieu, let’s get started!
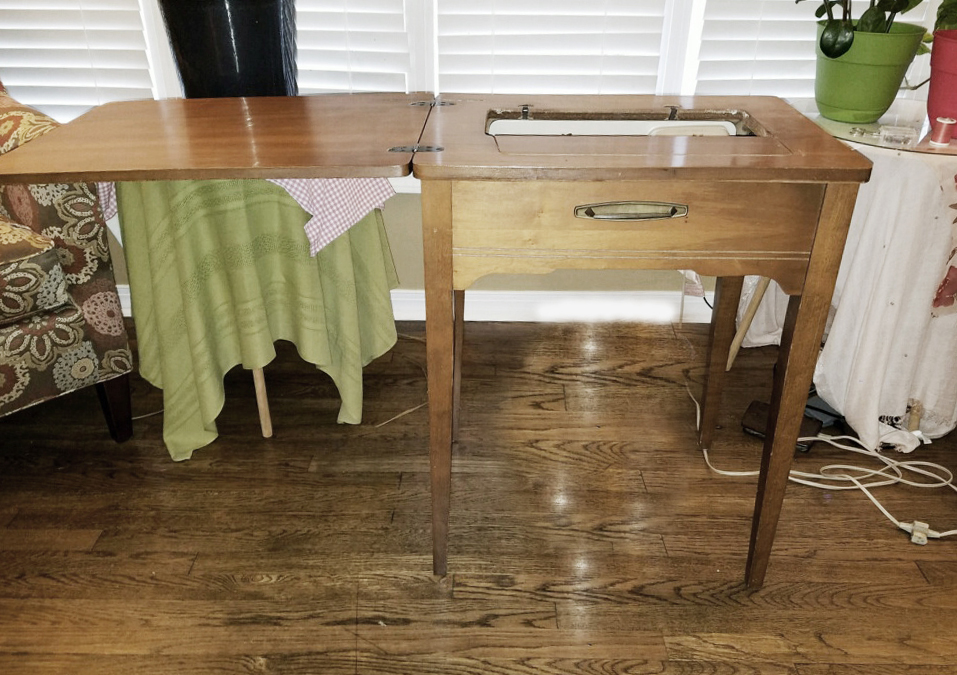
The hardest part of this project is getting your hands on one of these bad boys: An old sewing machine cabinet.

I didn’t take a before picture of my cabinet so I had a friend from work snap a picture of hers. Picture provided by: Heather Crouse.
I was lucky enough to find one neglected on the side of the road for the low, low cost of awkwardly scissor carrying it from the person’s lawn into the back of my car. The cabinet shown above is from a friend who bought it at a local thrift store for about $12, so there are definitely some out there, you just have to look!
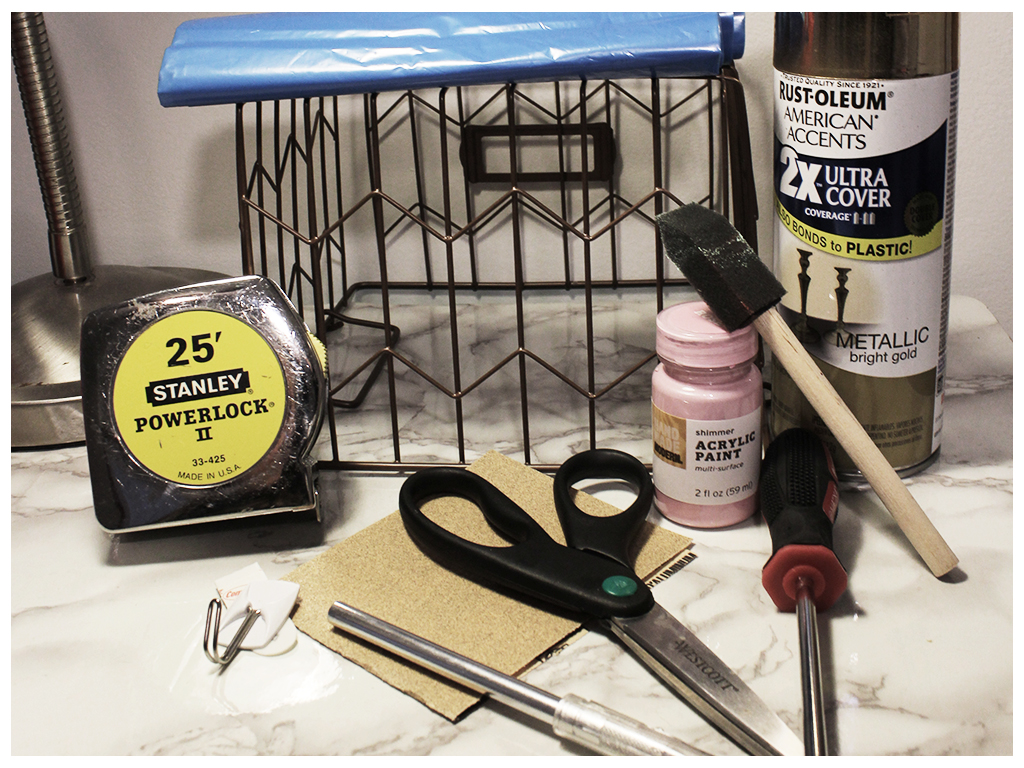
Here are the supplies you’ll need:
-Gold spray paint
-Acrylic craft paint (any color you want, I used light pink on mine. Make sure you buy two just in case.)
-Sponge brush
-Marble contact paper (you will probably need to purchase this online, and make sure you measure the top of your cabinet before you order to make sure you have enough product. I got mine at Wish.com. Oh, you haven’t heard of that website? Well, sorry about your upcoming addiction.)
-Sand paper
-Screwdriver
-Tarp/trash bag
-Box cutter/Xacto knife
-Scissors
-Measuring tape
-Wire basket
-Command strips and hooks
Step 1 – Remove the hardware from the front of the cabinet and set to the side.
Step 2 – Sand down the cabinet. I’m not telling you to spend all day sanding, that would defeat the “quick” part of this project, just sand it down enough to take the varnish off so that the paint sticks better. Wipe it down with a damp paper towel when you’re satisfied to remove the loose particles.
Step 3 – Grab your tarp/trash bag and proceed to a well ventilated area. Put the cabinet on the tarp/trash bag and spray the legs and the lip of the lid with your gold spray paint.
You can also use gold paint, but I have found that to be expensive as this is a large surface area. Spray a few times until you are satisfied with the coverage. Don’t worry about getting the spray on the rest of the cabinet as these areas will be covered by the time you are finished.
If you want to have the hardware match the gold legs, spray paint it now.
Step 4 – Once the legs have dried, get your sponge brush and brush on the first coat of acrylic paint onto the front, back, and sides of the cabinet. Let the paint dry enough then go over with a second coat. If you leave enough time for the paint to dry in between, the less coats you will have to give it. Since we skipped the ‘priming’ part for time sake, you have to give the paint enough time to dry so that you’re not just constantly moving the paint with a wet brush. Coat as many times as needed.
Step 5 – Measure your surface, if you haven’t already done so, and cut out the appropriate amount from your contact paper roll. Wipe off the surface of your cabinet again as you need NO loose particles in order for the paper to stick. Pull back the wax paper from the contact paper and place at the end of the surface, slowly applying the contact paper while peeling away the wax paper. Press out any bubbles along the way. Once you have applied the contact paper, cut off the edges that hang over with your box cutter/Xacto knife so that it is flush against the surface lip.
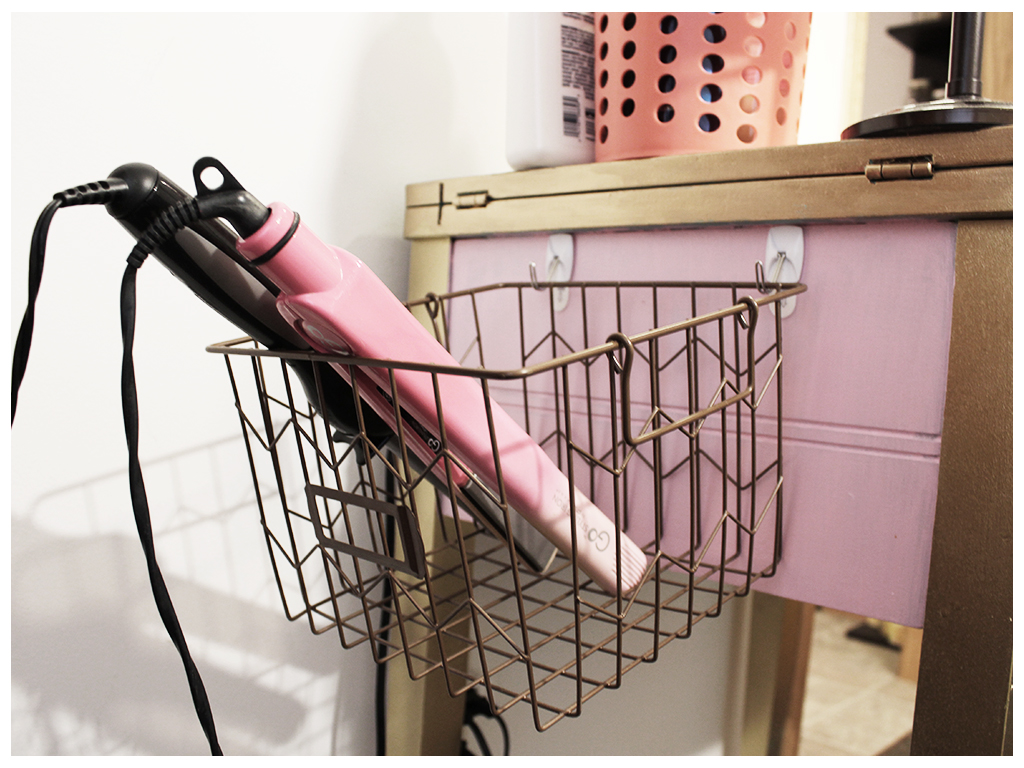
Step 6 – Once everything has had a good amount of time to dry, apply the Command hooks to the desired side of the vanity at the desired height you would like for your basket to hang.
Step 7 – Hang your basket on the Command hooks.
Step 8 – Put your vanity together with your makeup and hair supplies and mirrors.
Step 9 – Step back and admire your work!
Step 10 – Binge watch Netflix with all the time you have left in your day.
Yeah, it’s as quick and dirty as that! You’ll feel like a million bucks getting ready at this revamped vanity.

Not pictured – my totally awesome retro stool I sit on that slides perfectly under the vanity. I would suggest a skinny chair or one of those storage cubes you can get at the local WalMart.
Liz Valpatic is Digital Marketing and Promotions Coordinator, Woof Boom Radio— WLBC, WERK, MAX, Blake, WXFN and WHBU


